Skip to content
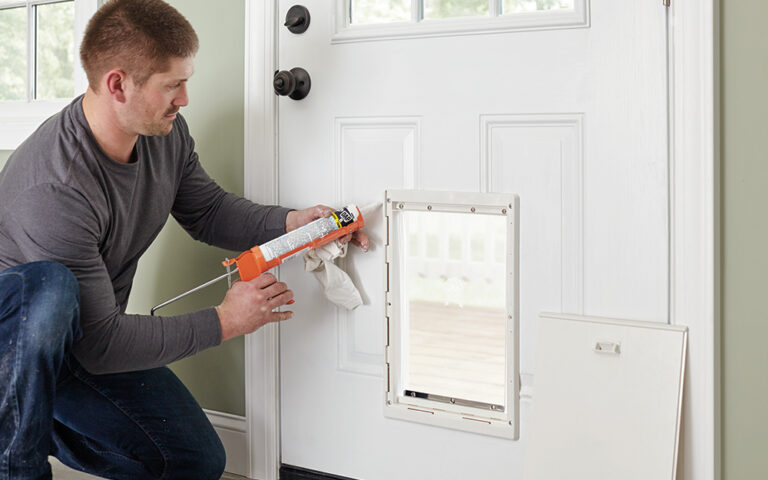
To put a dog door in a door, measure your dog’s height and width, mark the position, and cut the hole. Then, attach the door and secure it in place with screws and caulk for insulation.
Putting a dog door in a door allows your furry friend the freedom to come and go as they please, as well as providing convenience for you as a pet owner. With the right tools and a step-by-step approach, installing a dog door can be a straightforward task.
This guide will walk you through the process of measuring, cutting, and securing the door, as well as providing tips for insulation and maintenance. By following these instructions, you can create a comfortable and accessible entryway for your pet within your door.

Credit: hainesglass.com.au
Choosing The Right Dog Door
Learn how to install a dog door in your door with these simple steps. Ensure you choose the right size and type of door that suits your pet’s needs.
When it comes to installing a dog door in your door, one of the most crucial steps is choosing the right one. A dog door allows your four-legged friend to come and go freely, providing them with the independence they desire. Before diving into the installation process, follow these important considerations to ensure you select the perfect dog door for your needs.
Measure Your Dog
Before purchasing a dog door, it’s important to measure your furry friend to ensure a proper fit. Start by measuring your dog’s width, from shoulder to shoulder, and then measure their height from their paws to the top of their head. Additionally, measure the door height and width to make sure the dog door will fit seamlessly. Keep these measurements in mind while searching for a suitable option.
Consider The Door Material
When choosing a dog door, consider the material of the door it will be installed in. Different types of dog doors are designed for specific door materials, such as wood, metal, or glass. Analyze the construction of your existing door and opt for a dog door that is compatible. This will ensure a secure and sturdy installation that will last for years to come.
Check For Weatherproofing Features
As your dog will be using the dog door year-round, it’s important to select one that includes weatherproofing features. These features help to keep out drafts, rain, and other elements, ensuring your home remains cozy and dry. Look for features such as double-flap insulation and weatherstripping to provide optimal thermal insulation for your pup’s comfort.
In conclusion, choosing the right dog door is essential for a successful installation. By measuring your dog, considering the door material, and checking for weatherproofing features, you can ensure that your furry friend can safely and comfortably access the outdoors whenever they please. So, let’s dive into the installation process and provide your dog with the freedom they deserve.
Gathering The Tools And Materials
Gathering the tools and materials is the first step in installing a dog door in your door. Having the right items on hand ensures a smoother and more efficient installation process.
Dog Door Kit
A dog door kit will include all the necessary components for installation, including the door frame, flap, and hardware. Ensure that the kit is appropriate for the size of your dog.
Measuring Tape
Use a measuring tape to accurately determine the dimensions of your dog and the appropriate height for the door. Precision is crucial for a proper fit.
Pencil
A pencil will be used for marking the area on your door where the dog door will be installed, as well as making precise measurements and notes.
Jigsaw Or Saw
A jigsaw or saw will be necessary for cutting the opening in the door to accommodate the dog door. Ensure that it is suitable for cutting the door material.
Drill
A drill will be needed to create holes for screws or bolts during the installation process. Ensure it is compatible with the door material.
Screws Or Bolts
Screws or bolts will be used to secure the dog door frame in place. Ensure you have the appropriate size and type for a secure installation.
Level
A level will be necessary to ensure that the dog door is installed straight and plumb. This ensures proper functionality and appearance.
Weatherproofing Sealant
Weatherproofing sealant will help to seal the edges of the dog door to prevent drafts and water infiltration. Choose a sealant suitable for the door material and climate conditions.
Preparing The Door
When installing a dog door, proper preparation of the door is essential to ensure a secure and functional fit. This involves carefully choosing the installation location, marking the opening, drilling starter holes, and cutting the opening. Follow the steps below to prepare the door for the installation of a dog door.
Choosing The Installation Location
Before starting the installation, carefully evaluate the ideal location for the dog door. Consider the height and accessibility for your pet. The location should be away from any potential obstructions, such as hardware or panels, and should be at a suitable height for your pet to easily access.
You should also consider the environmental factors, such as prevailing winds and potential exposure to elements. Choose a location that minimizes exposure to extreme weather conditions and ensures the comfort and safety of your pet.
Marking The Opening
Once you have chosen the location, use a pencil and a level to mark the corners of the opening on the door. Ensure that the markings align with the measurements provided by the dog door manufacturer. Double-check the measurements to avoid any errors in the marking process, as these can impact the final installation.
Drilling Starter Holes
After marking the opening, use a drill to create starter holes at the corners of the marked area. These starter holes will act as guidelines for cutting the opening and will help to prevent any splintering or damage to the door during the cutting process. Make sure the drill bit size is appropriate for the type of door material to prevent any splitting or cracking.
Cutting The Opening
With the starter holes in place, you can proceed to cut the opening for the dog door. Use a jigsaw or a circular saw if necessary, following the marked outline. Take your time and ensure a smooth and precise cut to accommodate the dog door. Always prioritize safety during this process, wearing appropriate protective gear and taking necessary precautions to prevent accidents.
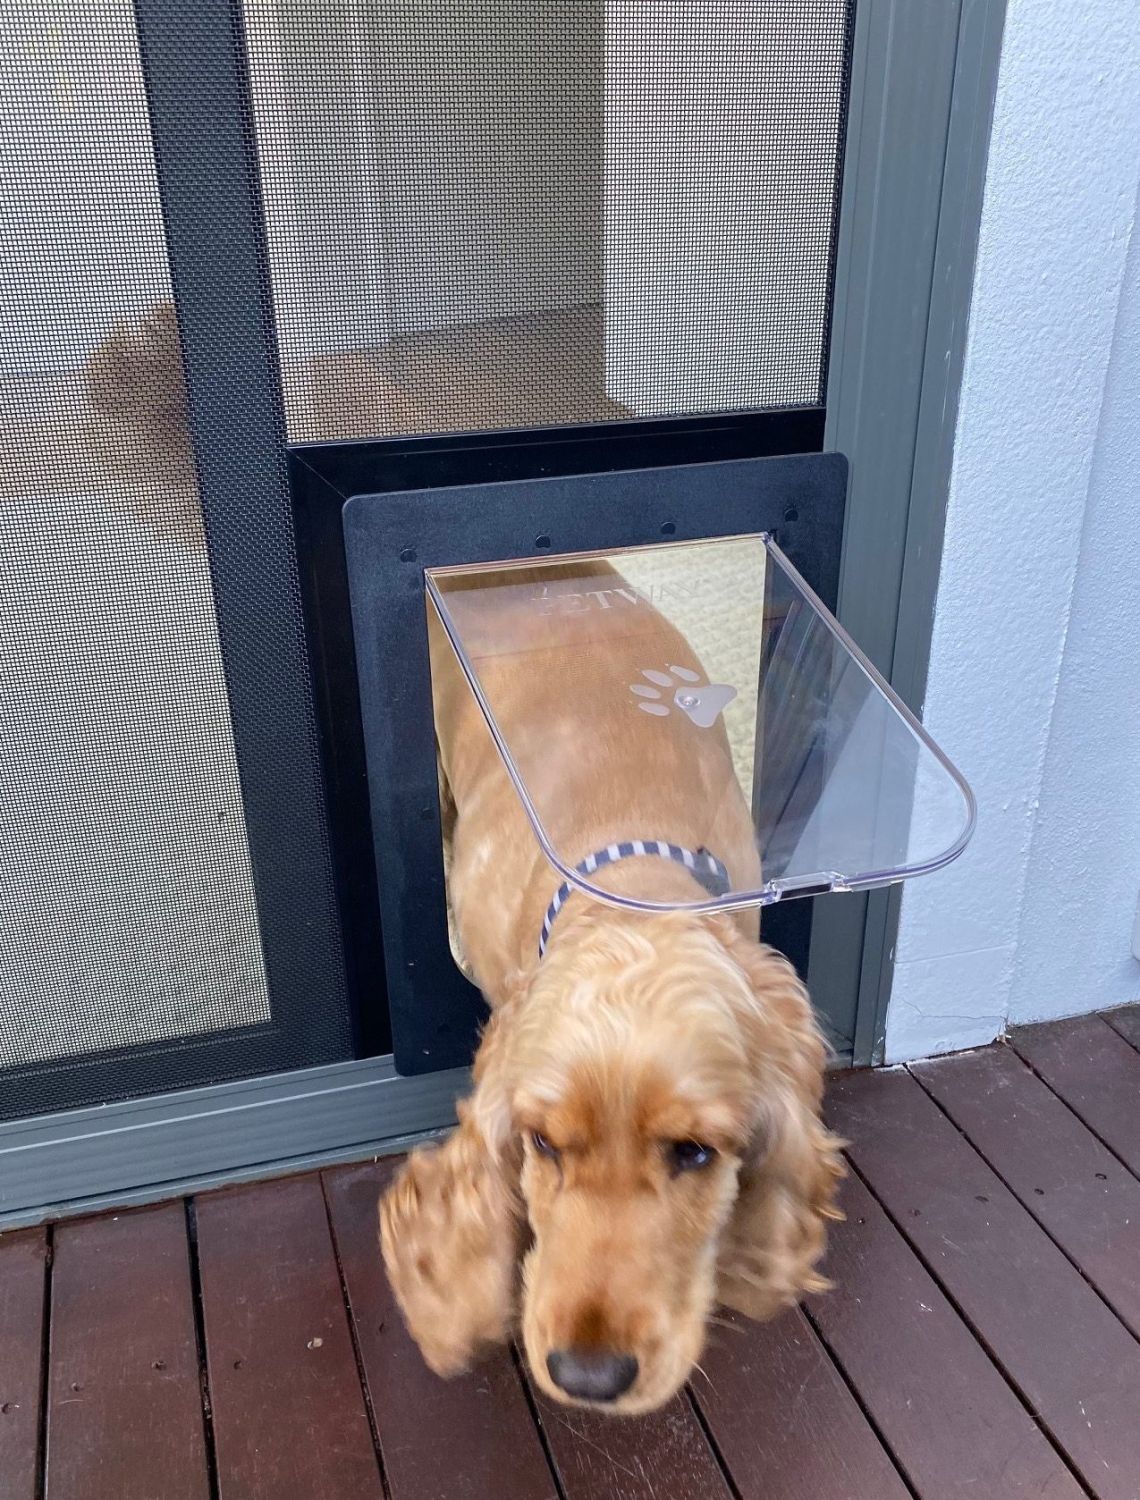
Credit: www.spscreens.com.au
Installing The Dog Door
Once you have chosen the perfect dog door for your furry friend to enjoy the freedom of going in and out as they please, it’s time to get started with the installation process. By following these simple steps, you’ll have a dog door seamlessly installed in your door in no time. Let’s dive in!
Assembling The Dog Door
Before you can install the dog door, you need to assemble it properly. Most dog doors come with clear instructions and all the necessary components. Take a moment to review the instructions and ensure you have all the required tools handy, such as a drill, screws, and a saw. Once you have everything ready, follow these steps:
- Identify the various parts of the dog door, such as the frame, flap, and locking mechanism.
- Fit the flap into the frame, making sure it is aligned properly.
- Secure the flap to the frame using the screws provided, tightening them just enough to hold it in place.
Inserting The Dog Door Into The Opening
Now that your dog door is assembled, it’s time to insert it into the opening in your door. This step requires precision and attention to detail to ensure a proper fit. Here’s what you need to do:
- Measure the height and width of your dog to determine the ideal placement of the dog door on your door.
- Use a pencil or chalk to mark the outline of the dog door on your door, taking into account the measurements you took.
- Using a saw, carefully cut along the marked outline, ensuring smooth edges.
- Gently insert the dog door into the opening, making sure it fits snugly.
Securing The Dog Door
Now that the dog door is in place, you need to secure it to prevent any movement or potential hazards. Here’s how to do it:
- Use the screws provided to attach the dog door’s frame securely to your door.
- Double-check all the screws to ensure they are tightened properly, providing a sturdy and secure installation.
Testing The Door’s Functionality
Once the dog door is securely installed in your door, it’s crucial to test its functionality before letting your furry companion use it. Follow these steps to make sure everything is working smoothly:
- Gently open and close the dog door several times to check if the flap moves freely without any obstructions.
- Encourage your dog to approach and go through the dog door, observing their ease of use.
- Make any necessary adjustments to ensure the dog door operates smoothly and comfortably for your pet.
There you have it! By following these step-by-step instructions, you can successfully install a dog door in your door, allowing your four-legged friend the freedom and independence they deserve.
Finishing Touches And Maintenance
Once you have successfully installed a dog door in your door, taking care of the finishing touches and maintenance is crucial to ensure its longevity and functionality. These final steps are essential to provide weatherproofing, trim any excess material, and maintain cleanliness for your dog’s comfort and safety.
Applying Weatherproofing Sealant
Weatherproofing sealant is a vital component in ensuring that your newly installed dog door is protected from the elements. It prevents drafts, water leaks, and any potential damage caused by harsh weather conditions. To apply weatherproofing sealant:
- Carefully inspect the edges of the dog door to identify any gaps or cracks.
- Using a caulk gun, apply a bead of weatherproofing sealant along these areas.
- Make sure to spread the sealant evenly and fill in any gaps completely.
- Allow the sealant to dry according to the manufacturer’s instructions before testing the door’s functionality.
Trimming Excess Material
After installing the dog door, you may notice some excess material that needs to be trimmed to ensure a neat and secure fit. Here’s how to trim excess material:
- Carefully examine the edges of the dog door frame.
- Identify any parts that extend beyond the door surface.
- Using a sharp utility knife or a saw, trim off these excess portions of the frame.
- Make sure to follow the manufacturer’s guidelines to avoid damaging the door or compromising its stability.
Regularly Cleaning And Maintaining The Dog Door
Maintaining cleanliness and regularly cleaning the dog door is essential to ensure the health and well-being of your furry friend. Here are some tips for cleaning and maintaining the dog door:
- Wipe down the dog door regularly using a damp cloth or sponge to remove any dirt, dust, or pet hair.
- Check the door flap for any signs of wear and tear or damage. Replace it if necessary.
- Inspect the hinges and locking mechanisms, ensuring they are in good working condition.
- Remove any debris or obstructions from the door tracks to ensure smooth opening and closing.
By applying weatherproofing sealant, trimming excess material, and regularly cleaning and maintaining the dog door, you can ensure that it remains functional and comfortable for your four-legged companion. Following these essential steps will help you provide the best possible door for your dog’s convenience and overall well-being.
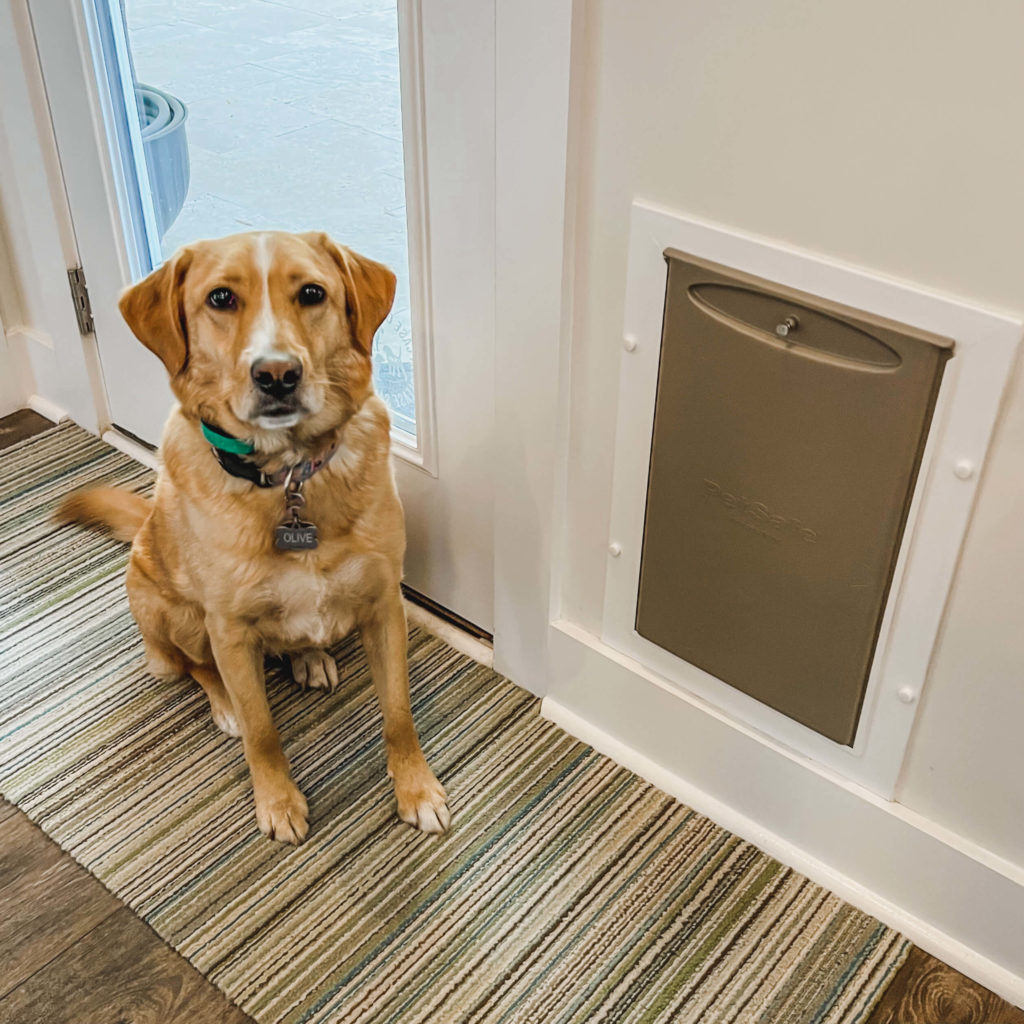
Credit: affluentdogs.com
Frequently Asked Questions Of How To Put A Dog Door In A Door
How Do You Install A Dog Door In A Door?
To install a dog door in a door, measure and mark the desired height, ensuring it is low enough for your dog to comfortably enter and exit. Use a jigsaw to cut a hole along the marked area. Insert the dog door frame into the hole and secure it with screws.
Attach the door flap, making sure it swings freely.
What Tools Do I Need To Put A Dog Door In A Door?
To put a dog door in a door, you will need a measuring tape, a pencil, a jigsaw or reciprocating saw, a drill, a screwdriver, screws, a level, and a dog door kit that includes the door flap and frame.
Having these tools handy will make the installation process much easier.
Can Any Door Have A Dog Door Installed?
Not every door is suitable for a dog door installation. Hollow core doors, for example, may not be strong enough to support the dog door. Additionally, glass doors or doors with metal panels may require professional installation. It’s best to consult with a hardware store or a professional to ensure your door is suitable for a dog door installation.
Conclusion
Installing a dog door in your door can provide ease and convenience for both you and your furry friend. By following the step-by-step process outlined in this guide, you can effortlessly create a safe and accessible entrance for your dog.
Remember to choose the right type of dog door, measure accurately, and follow the installation instructions carefully. With a little bit of effort, you can make your pet’s life more comfortable and give them the freedom to come and go as they please.
Happy installing!